Interior design photo editing guide for DIY enthusiasts
Interior design photo editing guide for DIY enthusiasts
You’ve spent weeks planning your dream living room makeover, carefully selecting paint colors and arranging furniture, only to find your photos don’t capture the transformation. Many homeowners face this challenge when showcasing their interior design efforts. The good news is that accessible AI photo editing tools can dramatically improve your photos without requiring professional skills. This guide walks you through preparation, editing techniques, and verification steps to help you present your home beautifully.
Table of Contents
- Key takeaways
- Preparing your interior photos for editing
- Step-by-step guide to AI-based interior photo editing
- Troubleshooting common photo editing mistakes
- Verifying and sharing your enhanced interior photos
- Enhance your interior design photos with VibeMyFlat
- Frequently asked questions
Key Takeaways
| Point | Details |
|---|---|
| Prepare photos carefully | Choose well lit, clear, and steady shots to maximize AI improvements and minimize artificial results. |
| Organize workflow | Create folders for originals, edits, and final outputs to prevent overwriting and track progress. |
| Balance lighting and color | Use brightness and contrast adjustments carefully and correct white balance for natural looking interiors. |
| Verify results | Review edits to ensure they align with your design goals and avoid over editing. |
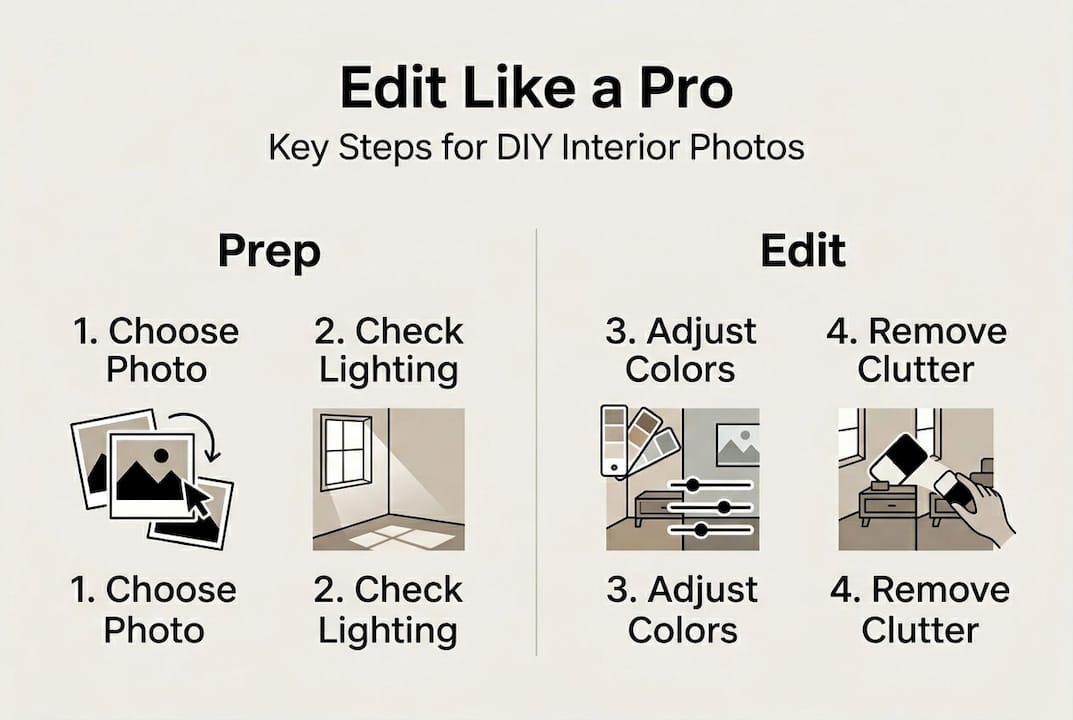
Preparing your interior photos for editing
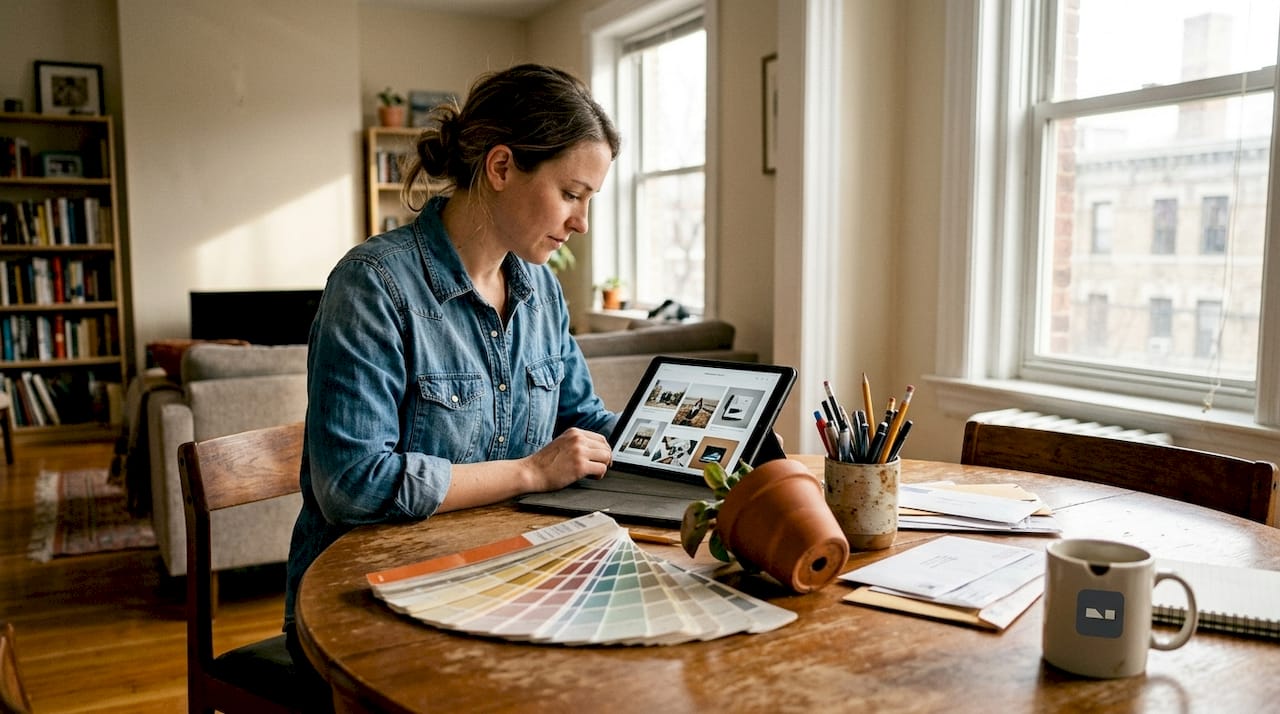
Successful photo editing starts long before you open any software. The quality of your original photos determines how much improvement AI tools can deliver. Think of it like cooking: fresh ingredients make better meals, and clear, well-composed photos make better edits.
Start by choosing photos with adequate natural or artificial lighting. Dark, shadowy images require more aggressive editing that often produces artificial-looking results. Look for shots where you can see details clearly without squinting. Your camera should be steady, producing sharp images without motion blur. Proper selection and preparation of photos impacts the editing outcome significantly.
Organize your workspace before uploading. Create folders for original photos, edited versions, and final outputs. This system prevents accidentally overwriting originals and helps track your progress. When selecting multiple room photos, batch similar shots together for consistent editing.
Photo selection checklist:
- Room is well-lit with minimal harsh shadows
- Image resolution is at least 1920x1080 pixels
- Camera was steady during capture
- Key design elements are clearly visible
- Minimal clutter or distracting objects
- Straight angles without distortion
Understand your AI photo editor app requirements before starting. Most platforms work directly in web browsers, requiring only a stable internet connection. Mobile apps offer convenience for quick edits on the go. Check file format compatibility; JPEG and PNG work universally, while RAW files may need conversion.
Consider the interior painting workflow when timing your photos. Capture images after completing major work but before final styling. This approach gives you flexibility to enhance photos while maintaining authenticity.
| Preparation Step | Time Required | Impact on Results |
|---|---|---|
| Photo selection | 10-15 minutes | High |
| File organization | 5 minutes | Medium |
| Software setup | 5-10 minutes | Medium |
| Quality check | 5 minutes | High |
Pro Tip: Take multiple shots of each room from slightly different angles. This gives you backup options if your first choice doesn’t edit well.
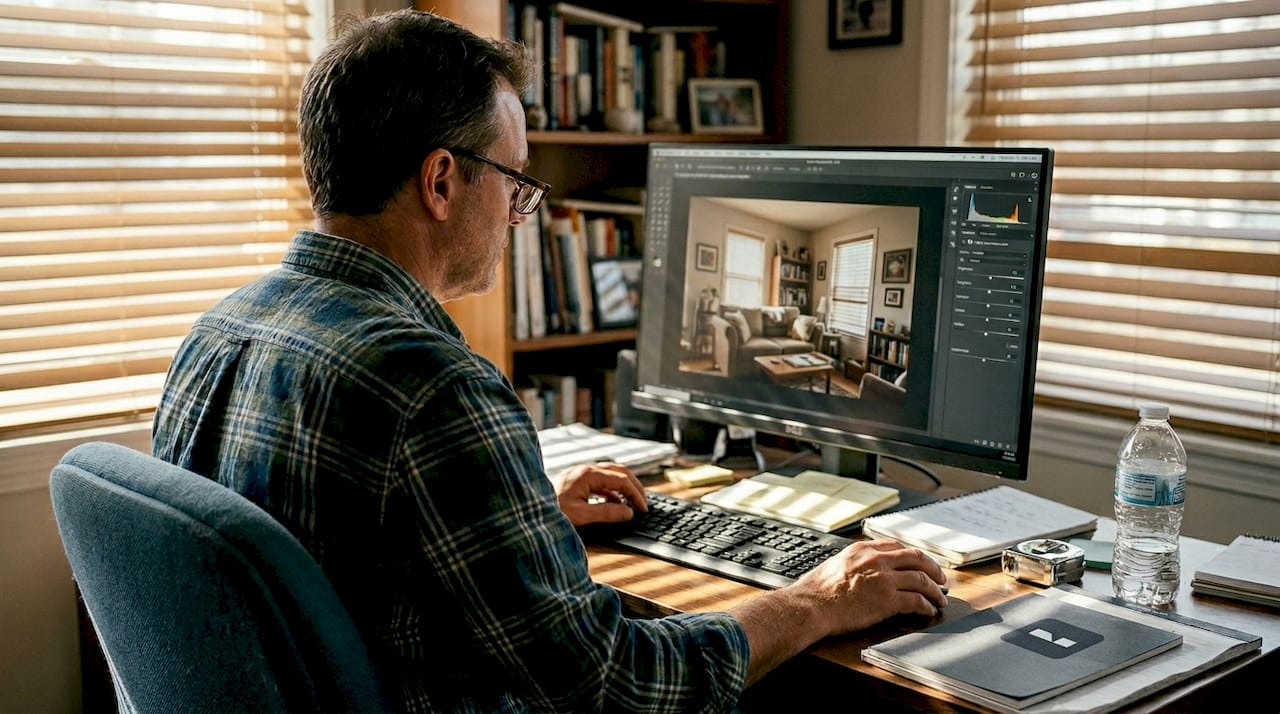
Step-by-step guide to AI-based interior photo editing
Now that your photos are ready, let’s walk through the actual editing process. AI tools simplify correcting lighting and color, making professional results achievable for anyone.
1. Upload your selected photo
Drag your image into the editor or use the upload button. Most platforms process files instantly, displaying your photo in the editing workspace. Check that the entire image loaded correctly without cropping.
2. Adjust brightness and contrast
Start with overall exposure. Increase brightness if rooms appear dim, but stop before highlights blow out to pure white. Boost contrast slightly to add depth and definition. AI editors often suggest optimal settings; try them first, then fine tune.
3. Correct colors and white balance
Interior lighting often creates color casts, making whites look yellow or blue. Use the white balance tool to neutralize these tints. Select a neutral area like a white wall or ceiling as reference. The AI analyzes your selection and adjusts the entire image accordingly.
4. Remove unwanted objects
Spot cleaning tools eliminate distractions like electrical outlets, cords, or small imperfections. Circle the item you want removed; AI fills the space by analyzing surrounding areas. This works remarkably well for small objects against uniform backgrounds.
5. Fine tune shadows and highlights
Separate shadow and highlight controls let you recover detail in dark corners or bright windows. Lift shadows to reveal texture in darker areas. Reduce highlights to prevent overexposed spots from dominating the composition. Understanding home value improvement helps prioritize which elements to enhance.
6. Save and organize edits
Export your finished photo in the appropriate format and resolution. Save a high-resolution master copy, then create optimized versions for specific uses. Name files descriptively so you can find them later.
| Adjustment Type | Typical Range | Effect on Photo |
|---|---|---|
| Brightness | +10 to +30 | Lifts overall exposure |
| Contrast | +5 to +15 | Adds depth and definition |
| White balance | 3000K to 7000K | Corrects color temperature |
| Shadow recovery | +20 to +40 | Reveals dark area detail |
| Highlight reduction | -10 to -30 | Prevents blown-out whites |
Pro Tip: Make adjustments in small increments. It’s easier to add more editing than to undo excessive changes that look unnatural.
Troubleshooting common photo editing mistakes
Even with powerful AI tools, certain mistakes can undermine your results. Recognizing these pitfalls helps you avoid them and maintain professional quality.
Over-editing creates the most obvious problems. Pushing sliders to extremes produces unnatural colors, harsh shadows, or glowing halos around objects. Your eyes adapt to gradual changes, making it easy to go too far without noticing. Knowing common pitfalls helps improve editing quality and saves time.
Resolution issues plague many DIY editors. Editing low-resolution photos works fine on screens but produces pixelated, blurry prints. Always start with the highest resolution available. If you plan to print, use images with at least 300 DPI at the final print size.
Screen calibration affects how you perceive edits. A photo that looks perfect on your bright phone screen may appear too dark on a laptop or printed page. Check edits on multiple devices before finalizing. Pay special attention to color accuracy; what looks warm and inviting on one screen might appear orange on another.
Common mistakes to avoid:
- Applying heavy filters that obscure natural textures
- Ignoring composition while focusing only on color
- Forgetting to save incremental versions
- Editing in poor lighting conditions
- Rushing through adjustments without previewing
- Copying settings blindly across different photos
“Subtlety is the hallmark of professional photo editing. The best enhancements are invisible, making viewers focus on your design rather than the editing itself.”
Version control prevents disaster. Save your work frequently using incremental file names like “living_room_v1,” “living_room_v2,” and so on. This practice lets you backtrack if an editing direction doesn’t work out. Understanding interior repainting benefits can inform which room features to emphasize through editing.
Natural lighting settings produce the most believable results. AI tools trained on professional photography understand how light behaves in real spaces. Trust these automated suggestions as starting points, then adjust based on your specific room conditions.
Verifying and sharing your enhanced interior photos
After investing time in editing, proper verification ensures your photos achieve their intended impact. Quality control catches issues before you share widely.
Compare before and after versions side by side. This comparison reveals whether edits enhanced or distorted your original vision. Look specifically at skin tones if people appear in shots, wood grain authenticity, and fabric textures. These elements should look enhanced but not artificial.
Balanced lighting creates depth without drama. Check that shadows fall naturally and highlights don’t overwhelm. Your eye should move comfortably through the image without getting stuck on overly bright or dark spots. High-quality photos attract attention and showcase your renovation work effectively.
Test images across devices before publishing. View photos on your phone, tablet, laptop, and desktop monitor if available. Color and brightness shift between screens, revealing potential problems. If a photo looks good everywhere, it’s ready to share.
Verification checklist:
- Colors appear natural and true to life
- No visible editing artifacts or halos
- Proper exposure across the entire image
- Details remain sharp and clear
- Consistent quality with other edited photos
- File size appropriate for intended use
Choose formats based on your sharing goals. JPEG files offer small sizes perfect for social media and email, with minimal quality loss at high settings. PNG preserves more detail and supports transparency, making it ideal for portfolios or websites where quality matters most.
| Sharing Method | Recommended Format | Resolution | Notes |
|---|---|---|---|
| Instagram/Facebook | JPEG | 1080x1080 | Square crops work best |
| JPEG | 1000x1500 | Vertical orientation preferred | |
| Portfolio website | PNG | 2000x1333 | High quality for close viewing |
| Email attachment | JPEG | 1200x800 | Balance quality and file size |
| Print (8x10) | PNG | 2400x3000 | 300 DPI minimum |
Captions add context that photos alone can’t convey. Describe your design choices, color selections, or renovation challenges you overcame. This storytelling approach engages viewers and highlights your expertise. Mention specific products or techniques when relevant to help others learn from your experience.
Social media platforms each have optimal posting practices. Instagram favors consistent visual styles and regular posting schedules. Pinterest users search for specific solutions, so descriptive titles and keywords matter. Facebook groups dedicated to home improvement offer engaged audiences eager for inspiration. Learning from professional refinishing benefits can guide which project aspects to emphasize.
Pro Tip: Create a simple watermark with your name or social handle to protect your photos when sharing publicly. This establishes ownership while allowing your work to spread.
Enhance your interior design photos with VibeMyFlat
Putting these editing techniques into practice becomes effortless with the right tools. VibeMyFlat offers AI-powered photo editing specifically designed for interior spaces, making professional results accessible to every homeowner.
The platform understands interior design principles, automatically recognizing walls, furniture, and lighting conditions. Simply describe what you want to change using natural language, and the AI handles complex adjustments in under 30 seconds. Whether you’re brightening a dim corner, changing wall colors, or removing unwanted items, the interface guides you through each step intuitively.

Homeowners and DIY enthusiasts benefit from features tailored to common renovation scenarios. Test paint colors virtually before buying gallons. Visualize furniture arrangements without heavy lifting. Remove clutter from listing photos to highlight your home’s potential. The VibeMyFlat AI photo editor works seamlessly across web browsers and mobile devices, letting you edit anywhere inspiration strikes. Try it today to transform your interior design photos from ordinary snapshots into compelling showcases of your creative vision.
Frequently asked questions
How can AI photo editing help improve my interior design photos?
AI automates complex edits like lighting correction and object removal, making photos look professional without advanced skills. It analyzes your image to enhance colors, adjust brightness, and remove distractions while maintaining natural appearance. This technology saves hours compared to manual editing and produces consistent results across multiple photos.
What are the best photos to select for editing interior designs?
Select well-lit, high-resolution photos with minimal clutter and clear views of key design elements. Avoid blurry or poorly framed images, as even powerful AI can’t recover missing detail or fix fundamental composition problems. Photos taken in good natural light with steady cameras provide the best foundation for enhancement.
Can I edit photos without prior graphic design experience?
Yes, modern AI editing apps offer intuitive interfaces that guide you through enhancements automatically. The software suggests optimal adjustments based on your image, requiring only simple approval or minor tweaking. No technical knowledge of color theory, exposure, or composition is necessary to achieve great results.
How do I avoid over-editing my interior photos?
Use subtle adjustments and preview frequently on multiple devices to ensure natural appearance. Avoid extreme filters and keep edits consistent with how the room actually looks in person. Take breaks during editing sessions; fresh eyes catch excessive changes you might miss after staring at the screen too long.
What’s the best way to share my enhanced interior design photos?
Use high-resolution JPEGs for social media to balance quality and file size, while PNG format preserves maximum detail for portfolios. Add descriptive captions explaining your design choices and share via platforms where your target audience engages most actively. Consider creating platform-specific versions optimized for each site’s display requirements.