Why professional photo editing elevates property visuals
Why professional photo editing elevates property visuals
Listings with professionally edited photos receive 118% more online views than those without. That number alone should make every real estate agent, homeowner, and DIY renovator stop and reconsider how they present their properties. Yet most listings still go live with flat, poorly lit, or unedited images that fail to capture a buyer’s attention within the first few seconds of scrolling. Professional photo editing isn’t a luxury reserved for luxury listings. It’s a practical, measurable strategy that drives real engagement, builds perceived value, and ultimately helps properties sell faster and at better prices. This guide breaks down what professional editing actually means, how it impacts your results, and how to apply it responsibly.
Table of Contents
- What defines professional-quality photo editing?
- The real impact: Engagement and selling power
- Ethics, disclosure, and avoiding pitfalls
- Practical use: How to apply professional editing for property marketing
- Elevate your property visuals with AI-powered editing
- Frequently asked questions
Key Takeaways
| Point | Details |
|---|---|
| Boosts engagement | Professional editing can increase listing views by over 100%, drawing more interest from buyers. |
| Supports ethical marketing | Disclosing major edits keeps your clients’ trust and complies with real estate laws. |
| Realistic enhancements matter | Focus on techniques that showcase homes authentically, like lighting and clutter removal. |
| Practical for all skill levels | AI tools and step-by-step guides make quality editing accessible for agents, homeowners, and DIY renovators. |
What defines professional-quality photo editing?
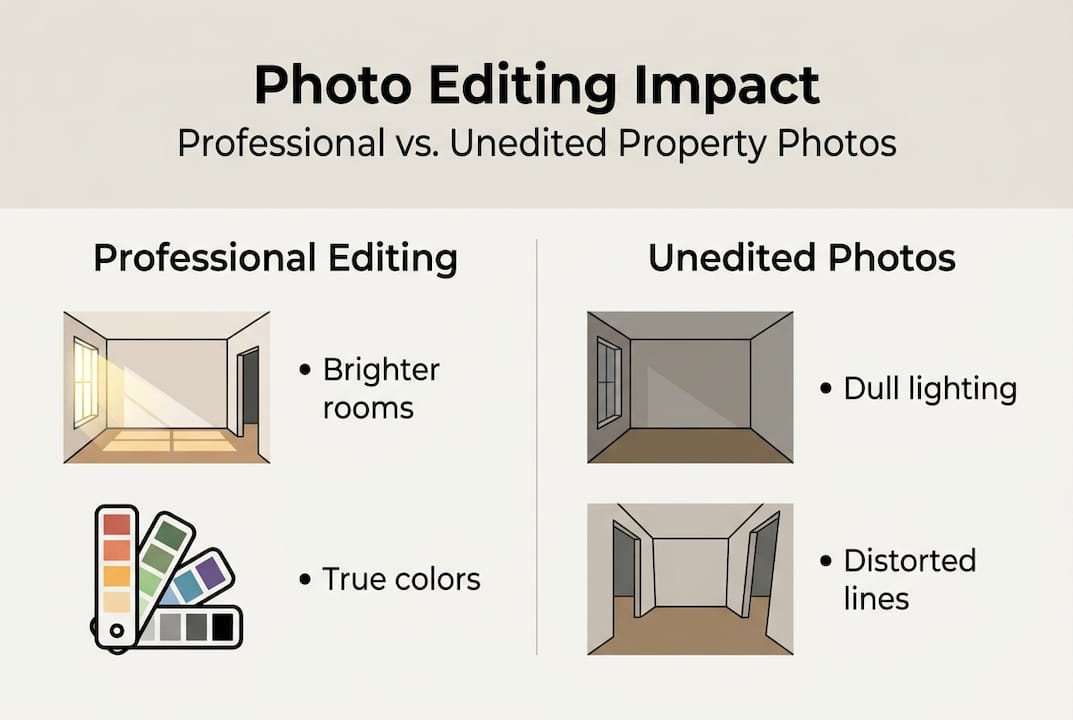
Not all editing is created equal. Basic editing might mean bumping up the brightness or cropping a photo on your phone. Professional-quality editing goes much further, and the difference is visible immediately.
At its core, professional editing involves lighting correction, color balancing, image sharpening, perspective correction, and clutter removal. These aren’t just cosmetic tweaks. They work together to make a space look accurate, inviting, and well-proportioned. A good interior photo tutorial will show you how even a single lighting adjustment can transform a dark, uninviting room into a bright, airy space buyers actually want to walk into.
Here’s a quick comparison of what separates professional editing from basic DIY approaches:
| Feature | Professional editing | Basic/DIY editing |
|---|---|---|
| Lighting correction | Advanced, multi-zone | Simple brightness slider |
| Color accuracy | Calibrated white balance | Auto-correct filter |
| Perspective fix | Lens distortion correction | None |
| Clutter removal | Object removal tools | Manual cropping only |
| Output quality | High-res, web-optimized | Compressed, inconsistent |
| Time investment | Efficient with AI tools | Slow, manual process |
Professional editing also means staying ethical. The editing apartment photos process should always reflect reality. According to industry best practices, you must disclose major edits or staging to maintain buyer trust and focus on realistic enhancements rather than fabricated scenes.
Key elements of professional-quality editing include:
- Correcting uneven or harsh lighting without making rooms look artificial
- Balancing colors so walls, floors, and furnishings appear true to life
- Removing distracting objects like cords, personal items, or trash cans
- Sharpening details to highlight architectural features and finishes
- Optimizing image resolution for both web listings and print materials
The real impact: Engagement and selling power
Numbers tell the story better than any opinion. Listings with 118% more online views from professional editing aren’t just getting more clicks. They’re generating more inquiries, more showings, and more competitive offers.

Buyers make snap judgments. Research consistently shows that people decide within seconds whether a listing is worth their time. A blurry, dark, or cluttered photo signals neglect, even if the property itself is immaculate. A clean, well-lit, professionally edited image signals care, quality, and value.
Here’s how photo quality stacks up across key performance metrics:
| Metric | Professionally edited photos | Unedited/basic photos |
|---|---|---|
| Online views | Up to 118% higher | Baseline |
| Inquiry rate | Significantly higher | Lower |
| Days on market | Shorter | Longer |
| Perceived property value | Higher | Lower |
| Social media shareability | High | Low |
A seamless editing guide can help you understand the workflow behind these results. And if you’re curious about the technology driving faster turnarounds, rapid AI photo editing has changed what’s possible for individual agents and homeowners without big budgets.
How professional editing supports your marketing strategy:
- Creates a strong first impression on listing platforms like Zillow and Realtor.com
- Increases the likelihood of buyers saving or sharing your listing
- Supports higher asking prices by elevating perceived property condition
- Reduces time on market by attracting serious buyers faster
- Strengthens your personal brand as an agent or seller who takes quality seriously
Stat to remember: Listings with professional photos sell 32% faster on average, and the visual quality of your listing photos is often the single biggest factor in whether a buyer schedules a showing.
Ethics, disclosure, and avoiding pitfalls
Editing is powerful. That power comes with real responsibility. The practice known as “housefishing” refers to using heavily altered or misleading photos to attract buyers who then feel deceived when they visit the property in person. It’s not just bad practice. It can violate ethics and laws, including disclosure requirements in states like New York.
“Focus on realistic enhancements that present the property in its best true light. Always disclose major edits or staging to maintain buyer trust and avoid legal exposure.” — National Association of Realtors guidance
The line between enhancement and deception is clearer than you might think. Correcting poor lighting, removing a temporary piece of furniture, or sharpening a blurry image is enhancement. Adding a mountain view that doesn’t exist, digitally removing a power line that’s a permanent fixture, or making a 600-square-foot studio look like a 1,000-square-foot loft is deception.
Here’s how to stay on the right side of that line:
- Edit for accuracy first. Your goal is to show the property as it actually looks under good conditions, not to fabricate an idealized version.
- Disclose virtual staging. If you’ve digitally added furniture or decor, label the image clearly as “virtually staged.”
- Avoid removing permanent features. Power lines, neighboring buildings, and structural elements must stay in the photo.
- Check local disclosure laws. Requirements vary by state, so confirm what’s legally required in your market before publishing.
- Use an authentic photography tutorial as a reference to keep your edits grounded in reality.
For DIY renovators and homeowners, the editing guide for DIY is a practical resource that walks through compliant, effective editing without crossing ethical boundaries.
Practical use: How to apply professional editing for property marketing
Knowing the theory is one thing. Applying it efficiently is another. Here’s a straightforward workflow that works whether you’re an agent managing dozens of listings or a homeowner preparing a single property.
Step 1: Prep your shots. Before you even open an editing app, make sure your photos are taken in good natural light, with a wide-angle lens if possible, and with the space decluttered. Great editing starts with a decent raw image. Check out these lighting tips for photos to get your shots right before editing begins.
Step 2: Edit in a logical order. Start with exposure and white balance, then move to color correction, then sharpening, then object removal. Editing in this sequence prevents you from compounding errors.
Step 3: Export correctly. For online listings, export at 72 DPI with a width of at least 1,024 pixels. For print materials, use 300 DPI. File format matters too: JPEG for web, TIFF for print.
Pro Tip: Use AI-powered tools that support batch editing. If you have 20 photos from a single listing, applying consistent corrections across all of them at once saves hours and ensures visual consistency throughout your listing gallery.
For those new to the process, natural language editing tools let you describe what you want in plain English and get professional results instantly, no technical skills required.
Common pitfalls to avoid:
- Oversaturating colors so the space looks unrealistic
- Over-sharpening images, which creates a harsh, artificial look
- Ignoring perspective correction, which makes rooms look distorted
- Exporting at low resolution, which makes photos look pixelated on listing sites
- Forgetting to disclose realistic enhancements when staging or significant alterations are involved
Elevate your property visuals with AI-powered editing
Putting all of this into practice doesn’t have to mean spending hours in complex software or hiring an expensive photographer for every listing. VibeMyFlat is built specifically for real estate professionals, homeowners, and DIY renovators who want professional-quality results without the technical learning curve.

With VibeMyFlat’s AI photo editor for interiors, you simply describe the changes you want in plain language and the AI handles the rest in under 30 seconds. Adjust lighting, swap wall colors, remove clutter, or virtually stage a room with a single sentence. The platform works across desktop, iOS, and Android, so you can edit wherever your workflow takes you. For a deeper look at how to build an efficient editing process from start to finish, the seamless editing guide walks you through every step with practical examples tailored to property marketing.
Frequently asked questions
How much can professional editing increase my property’s online visibility?
Professionally edited photos can boost online views by up to 118%, making your listing significantly more competitive on major platforms like Zillow and Realtor.com.
Is it legal to edit listing photos in the U.S.?
Editing is legal, but major alterations must be disclosed to buyers. Misleading edits can violate real estate ethics rules and state disclosure laws, particularly in states like New York.
What editing techniques provide the biggest improvement?
Lighting adjustments, color balancing, and clutter removal deliver the most visible impact. These three techniques alone can transform a flat, uninviting photo into a standout listing image that attracts serious buyers.
How do I avoid over-editing my photos?
Stick to realistic enhancements that reflect the property’s actual condition, and always disclose significant changes like virtual staging so buyers know what to expect when they visit in person.