Step-by-step guide to AI lighting edits for stunning interiors
Step-by-step guide to AI lighting edits for stunning interiors

TL;DR:
- AI lighting edits help create realistic, warm, and layered interior photos easily.
- Proper photo prep, including white balance correction and composition, is essential for best AI results.
- Maintaining realism by verifying shadows, colors, and room geometry ensures credible, appealing images.
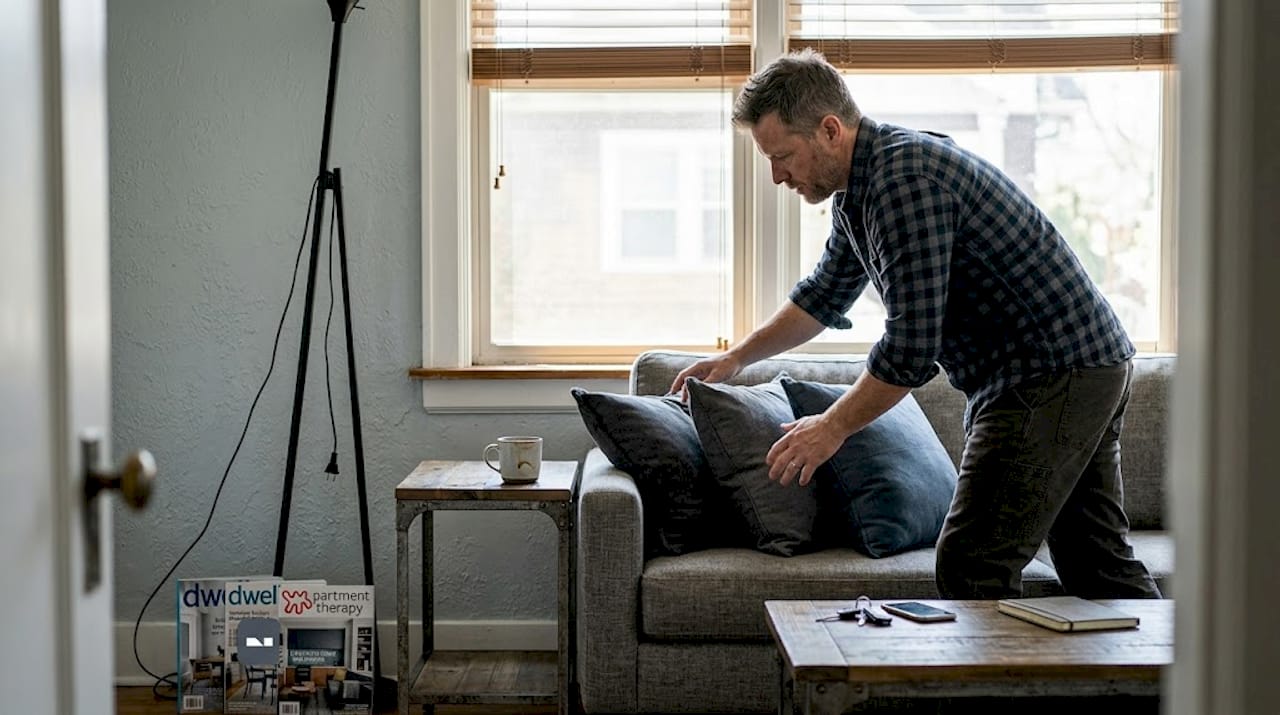
Getting interior photos that actually capture the warmth, depth, and mood of a room is harder than it sounds. Most DIYers end up with flat, washed-out shots that look nothing like the space they worked so hard to design. AI-driven lighting edits change that entirely. These tools let you simulate ambient glow, directional task lighting, and layered accent effects directly on your photos, without hiring a photographer or learning professional-grade software. This guide walks you through every stage, from setting up your toolkit to spotting and fixing common mistakes, so your interior photos finally match your vision.
Table of Contents
- What you need for AI lighting edits in interiors
- Preparing your interior photo for editing
- Step-by-step: Editing interiors with AI-driven lighting tools
- Troubleshooting and verifying your results
- Our perspective: Why realism matters more than quick results in lighting edits
- Ready to try AI lighting edits for your interiors?
- Frequently asked questions
Key Takeaways
| Point | Details |
|---|---|
| Prep is everything | Start with high-quality, carefully corrected photos for the most realistic AI lighting edits. |
| Use layered lighting | Simulate ambient, task, and accent lighting for depth and realism in AI edits. |
| Manual tweaks boost realism | Combine quick AI changes with selective manual edits to avoid fake effects and geometry errors. |
| Always verify scale | Check your edit’s scale, fit, and lighting in the real space before finalizing your design. |
What you need for AI lighting edits in interiors
With the purpose clear, let’s assemble everything you’ll need to get results.
You don’t need a high-end setup to get started, but a few things will make a real difference in your output quality. Here’s what to gather before you open any editing tool.
Hardware and software basics:
- A device with a decent screen (color accuracy matters, so avoid editing on a phone screen with low brightness)
- Reliable internet connection for cloud-based AI tools
- An AI-enabled photo editing app or platform (options below)
- The original, uncompressed photo files from your camera or phone
Recommended AI tools by experience level:
| Tool | Best for | Cost |
|---|---|---|
| VibeMyFlat | Homeowners, DIYers, natural language edits | Free tier available |
| Adobe Firefly | Intermediate users with design background | Subscription |
| Luminar Neo | Those wanting AI plus manual control | One-time purchase |
| Canva AI | Beginners needing simple quick edits | Free with paid options |
Beyond hardware and apps, you also need to understand one key concept before touching any slider: layered lighting. This means your room’s illumination comes from three distinct sources: ambient (the general fill light that sets the overall brightness), task (focused light for specific activities like reading or cooking), and accent (decorative highlights that draw attention to art, shelving, or architectural features). AI tools simulate this by reading the room’s existing light and layout, then recommending or applying fixture-appropriate effects based on detailed prompts you provide, including room dimensions, style preferences, and intended use.
Good lighting adjustment tips always start with understanding what kind of light your room already has before you try to add more. AI tools built around automated photo editing handle a lot of this analysis automatically, but knowing the vocabulary helps you write better prompts and understand why the AI makes the choices it does.
Pro Tip: Start with a free tool before investing in a subscription. VibeMyFlat’s natural language interface is particularly beginner-friendly because you describe what you want in plain English rather than adjusting sliders you may not understand yet.
Preparing your interior photo for editing
Now that your toolkit is ready, it’s time to prep your photo for optimal results.
Skipping this step is one of the biggest mistakes DIYers make. Even the best AI tool will struggle with a poorly prepared image. Garbage in, garbage out applies especially here because AI models are trained on high-quality inputs, and a blurry or color-shifted source photo limits everything downstream.
Step-by-step photo preparation:
- Import your photo at full resolution. Never work from a compressed social media export. Use the original file from your camera or phone gallery.
- Crop for composition. Remove distracting edges or furniture that cuts awkwardly into the frame. Aim for a balanced, centered shot that shows the main light sources and key furniture.
- Straighten the image. Tilted photos create unrealistic shadows when AI applies lighting effects. Use your app’s straighten or level tool to correct the horizon line.
- Correct the exposure. Bring heavily underexposed or overexposed areas toward the middle. You don’t need perfection, just enough range for AI to work with without creating blown-out highlights or crushed blacks.
- Fix the white balance (WB) first. This is non-negotiable. WB refers to how warm or cool the colors in your photo appear. Mixed light sources, like a tungsten lamp near a daylit window, create conflicting color casts that confuse AI lighting models. Prioritize fixing WB before any other edit to avoid inaccurate color temperatures bleeding into your AI-generated layers.
- Note existing fixtures and window positions. Before you open your AI tool, jot down where your ceiling light, floor lamp, and windows are in the frame. This context helps you write better prompts and cross-check the AI’s output.
“Color casts are the silent killers of interior photos. A tungsten lamp adds orange; daylight adds blue. When both appear in the same shot with uncorrected white balance, no AI tool can cleanly separate them. Fix WB first, always.”
Using a solid photo editing guide can help you understand these steps in more detail. And if you’re looking for a faster approach, explore quick AI photo edits that can handle exposure and WB corrections as part of the AI workflow.
Pro Tip: Take photos of your room at golden hour (the hour after sunrise or before sunset) if you want a naturally warm base image. AI tools can warm or cool this further, but starting with good natural light reduces the correction work significantly.
Step-by-step: Editing interiors with AI-driven lighting tools
With your image ready, let’s jump into the editing process, one step at a time.
This is where the real transformation happens. Follow these steps closely and you’ll get results that look professional, not processed.
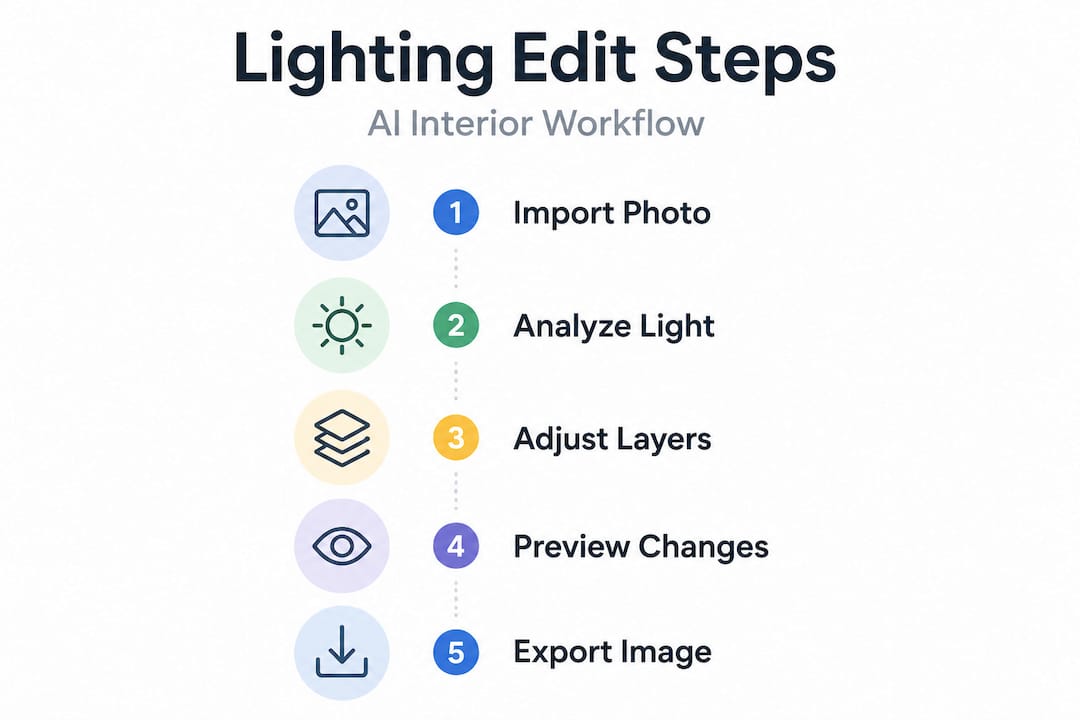
The editing workflow:
- Upload your prepared image to your chosen AI platform.
- Select or describe the lighting layer you want to edit first. Start with ambient light since it affects the entire room. In a natural language tool, you might type: “Add warm ambient lighting from a central ceiling fixture, 3000K, soft diffusion, medium brightness.”
- Set the strength and direction. Most AI tools allow you to dial in how intense the effect is. Start at 50% and increase gradually. For directional light (like a floor lamp), specify which corner or wall the light originates from.
- Test multiple prompts or presets. Don’t settle for the first result. Try “bright Scandinavian morning light” versus “cozy evening lamp glow” and compare how each changes the room’s mood.
- Add task and accent layers. Once your ambient base looks right, layer in task lighting (above a desk or kitchen island) and accent lighting (highlighting artwork or an exposed brick wall).
- Fine-tune with selective adjustments. Use masks or selection tools to apply corrections to specific areas. This prevents the entire image from shifting when you only want to brighten one corner.
AI lighting edit vs. manual Lightroom workflow:
| Factor | AI lighting edit | Manual Lightroom edit |
|---|---|---|
| Speed | Under 30 seconds | 15 to 45 minutes |
| Skill required | Beginner-friendly | Intermediate to advanced |
| Realism ceiling | High for visualization | Very high with expertise |
| Physics accuracy | Limited, no light bleed | Depends on editor skill |
| Best use case | Quick visualization, listings | Final production images |
Most common AI lighting adjustments to make:
- Warm or cool the overall color temperature
- Add directional shadow from a simulated window
- Brighten specific surfaces like countertops or rugs
- Simulate pendant or recessed lights in the ceiling
- Reduce harsh shadows under furniture
One important caution: AI may alter geometry in subtle ways, such as appearing to add or remove walls or change ceiling height. Always cross-check the edited photo against the original. On the realism front, AI excels at quick visualization but does not compensate for light bleed (the way real light wraps around objects and bleeds color onto nearby surfaces). For the most believable results, combine AI output with a quick manual pass in a tool like Lightroom to add that final layer of physics accuracy.
The AI visualization benefits are clearest when you’re planning a renovation or preparing listing photos. You can try a dozen lighting scenarios in the time it would take to set up one physical test.
Troubleshooting and verifying your results
Once your edits are complete, here’s how to ensure they look realistic and avoid common pitfalls.
Even a beautifully edited photo can fall apart under close inspection. Here’s a practical checklist to run through before you publish, share, or print any AI-edited interior image.
Common errors to check for:
- Fake shadows or impossible glows: Real light creates soft-edged shadows that fall in a consistent direction. If your shadows point in multiple directions or glow unnaturally, the AI has added effects without regard for a single light source.
- Inaccurate color temperature: A room lit by warm lamps should not have cool blue highlights on the walls. Mismatched color temperatures make the image look composited rather than captured.
- Altered room layout: Check corners, door frames, and window proportions against your original photo. AI can subtly reshape rooms.
- Over-processed surfaces: Textures on wood floors, fabric, or plaster can look plastic or overly smooth after aggressive AI edits.
- Unrealistic HDR glow: This is the halo effect that appears around high-contrast edges when tone mapping is too aggressive. Use selective masks to reduce this on window frames and lamp shades.
“AI is fast, but don’t trust blindly. Always confirm scale and fit by placing your edited photo side by side with the original. If something feels off, it probably is.”
Lighting impacts mood more powerfully than almost any other design element. Studies in environmental psychology consistently show that color temperature and light intensity shape how spacious, cozy, or energizing a room feels. That means getting your lighting edits right is not just an aesthetic choice. It directly affects how viewers emotionally respond to your space, whether they’re potential buyers or guests. Check out this resource on lighting mistakes to avoid for a broader look at how poor lighting choices undermine even well-designed spaces.
For a reliable final check, use AI photo enhancement tools that include before-and-after comparison modes. These let you toggle between your original and edited versions instantly, which makes it much easier to spot overcorrections.
Statistic callout: Research in interior design perception shows that lighting is cited by buyers and renters as one of the top three most influential factors in room appeal, ahead of furniture and paint color.
Our perspective: Why realism matters more than quick results in lighting edits
We’ve seen thousands of interior photos pass through AI editing tools, and there’s a consistent pattern: the ones that impress people are never the ones with the most dramatic effects. They’re the ones that look like they could be real.
The temptation with AI tools is to push every slider. More warmth. More glow. More drama. The result looks great on a thumbnail but falls apart at full resolution. Buyers notice. Homeowners notice. Anyone who has actually stood in a room and compared it to a photo notices.
Our belief is that AI lighting edits work best as a starting point, not a final destination. The AI handles the heavy lifting: analyzing room geometry, simulating light sources, adjusting color temperature across thousands of pixels in seconds. But the final 10% of quality comes from a human eye. That means zooming in to check shadow edges, pulling back a glow that reads as artificial, and making sure the room in the photo still looks like the room you actually own.
AI design ideas are most powerful when they help you iterate quickly and confidently. Use them to explore options, not to replace judgment. The homeowners who get the best results are the ones who stay curious, experiment freely, but always ask themselves: “Would someone believe this photo if they walked into my actual room?” If the answer is yes, you’re done. If it’s no, you have one more pass to make.
Realism also has a practical payoff. Well-lit, believable interior photos consistently perform better in real estate listings, rental platforms, and home design communities. The investment of a few extra minutes in verification pays off in credibility and engagement.
Ready to try AI lighting edits for your interiors?
If reading through this guide has you eager to see what your own space could look like with professional-grade lighting edits, there’s no reason to wait.

VibeMyFlat makes the entire process approachable for homeowners and DIYers with no design background required. You describe what you want in plain language, like “warm evening lighting from a floor lamp in the corner,” and the VibeMyFlat AI editor delivers a realistic result in under 30 seconds. There’s no steep learning curve, no complicated layer menus, and no expensive subscription to start. Sign up, upload your photo, and start experimenting with lighting scenarios that could transform how you see, share, or sell your space. Your room deserves to look as good in photos as it does in person.
Frequently asked questions
Can I make lighting edits on my phone, or do I need a computer?
Many AI-driven lighting edit apps work on both iOS and Android, though desktops give you a larger screen and more advanced features for fine-tuning selective adjustments.
How do I avoid fake lighting effects in my final image?
Check shadows for consistent direction, verify that color temperatures match throughout the scene, and confirm that room geometry stays accurate by comparing your edited photo against the original.
What lighting layers should I simulate for best results?
Simulate all three layers in order: ambient for overall fill, task for focused zones, and accent for highlights, since layered lighting is the foundation of realistic interior illumination.
Is AI lighting accurate enough to plan real renovations?
AI is excellent for quick visualization and exploring options fast, but always verify fixture placement, scale, and light intensity against your actual room measurements before purchasing anything.